Project management is the process where you lead a work team to achieve all project goals within the given constraints of scope, time and budget. Usually, a project document created at the commencement of the development process provides all the project-related information. A challenge one may encounter is needing to optimise and allocate resources to meet all the predefined tasks. This is how a software program like MS Project can make a world of difference. You will learn about all the critical functionalities of MS Project 2013 in this tutorial. We will demonstrate the key functionalities of tasks, predecessors, options and calendars. While learning about the features of MS Project, you will also learn more about some important project management concepts such as critical path, work breakdown and cost analysis. We will also show you how to categorise tasks and assign milestones. The tutorial progresses with the help of explanatory videos focussing on just one tool or functionality per video for easier understanding.
Next, you will be introduced to features enabling MS Project to create budgets based on tasks assigned and resource rates. Can resource information be shared between projects? Can you assign a resource to multiple tasks? Can MS Project customise the programme to meet the different project needs and demands? The tutorial will answer these questions and more as you learn about the key functions of 'View', 'Task', 'Project', and 'Resource' menus. A project team has to complete a project within the established timeline and budget. The tutorial will explain how you can use the software program to add constraints and link/unlink and update tasks. It also covers how to synchronise how your team members can collaborate on a project and analyse the project cost and resources. You will get familiar with the management tools used to track the progress of a project and learn how to navigate through the program for answers.
In the last module, you will learn about the tools and functions of MS Project that enable resource levelling, task inspector, filtering, grouping, tables and reports. Project 2013 includes graphical reports, and there is no need to export data to another program. It has a wide range of view options for tables, charts and reports to meet the needs of any user. It also includes a report organiser and troubleshooting or help menus. The tutorial explains the easy to use interface with short videos and formative questions that provide feedback for quick recapitulation and absorption of facts. A project management professional can balance the timeframe, budget and overall scope of a project. This makes them indispensable for any organisation. This tutorial will teach you to work with a helpful management tool and help you progress in your career. Do not miss the opportunity and enrol in this free course now.
Epilepsy Warning: The videos in this course start with fast, flashing lights that may cause discomfort and/or seizures for those with photosensitive epilepsy. Viewer discretion is advised.
What You Will Learn In This Free Course
View All Learning Outcomes View Less All Alison courses are free to enrol, study, and complete. To successfully complete this Certificate course and become an Alison Graduate, you need to achieve 80% or higher in each course assessment.
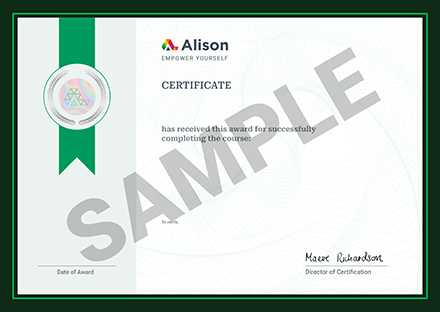
Once you have completed this Certificate course, you have the option to acquire an official Certificate, which is a great way to share your achievement with the world.
Your Alison certificate is:
- Ideal for sharing with potential employers.
- Great for your CV, professional social media profiles, and job applications.
- An indication of your commitment to continuously learn, upskill, and achieve high results.
- An incentive for you to continue empowering yourself through lifelong learning.
Alison offers 2 types of Certificate for completed Certificate courses:
- Digital Certificate: a downloadable Certificate in PDF format immediately available to you when you complete your purchase.
- Physical Certificate: a physical version of your officially branded and security-marked Certificate
All Certificate are available to purchase through the Alison Shop. For more information on purchasing Alison Certificate, please visit our FAQs. If you decide not to purchase your Alison Certificate, you can still demonstrate your achievement by sharing your Learner Record or Learner Achievement Verification, both of which are accessible from your Account Settings.


 Avg. Hours
 Contains Video
 CPD Accredited
 Certify Now


 Total XP:
 Knowledge & Skills You Will Learn