


Learning
Helpful articles to get you started on Alison and solve technical issues

Certificates and Payments
How Alison Certificates works, and your payment and delivery options

Mobile Application
How to make the most out of your learning through Alison's Mobile Applications

Ads-Free
Learn more about Alison's optional Premium packages

Publishing Tool
Learn how to use the Alison Publishing Tool features

Alison Business
Discover corporate services by Alison for businesses and non-profits, designed to make learning and development both effective and affordable.

Earn on Alison
What programmes does Alison have?

Free LMS FAQs for Learners
Essential support for business learners to navigate and utilize the Free LMS effectively.

Free LMS FAQs for Microsite
Explore the benefits and features of Free LMS to transform your organization's learning and development.

Free LMS FAQs for Managers
Guidance and insights to effectively manage your team's learning journey.
Hi. How can we help?
Welcome to Alison's Help Center; where all your most commonly asked questions are answered.
Before contacting us, use the search (above) or browse through our categories (left) to try and find your answer.

How to Create My Course?
To create modules and resources
To provide label information about a course or module
To divide courses into different sections
Crafting and developing your course should be an engaging process, offering both satisfaction and educational value. Upon completing the creation and submission stages, it's crucial to carefully review the feedback provided by the reviewers and make any necessary adjustments.
After you complete the course Information, you are ready to build your course content.
While the course length will vary based on its content volume, it's essential not only to adhere to Alison's specified minimum and maximum parameters but also to organise the content in a way that ensures a well-balanced structure, grouping relevant information together. Avoiding an imbalanced course, characterised by, for example, varying topic and page counts between modules, is essential for optimal course presentation.
Alison courses are structured hierarchically into Chapters, Modules, Topics and Pages.
Step 1 - Chapters
The highest division of course content is a Chapter. Chapters serves three purposes:
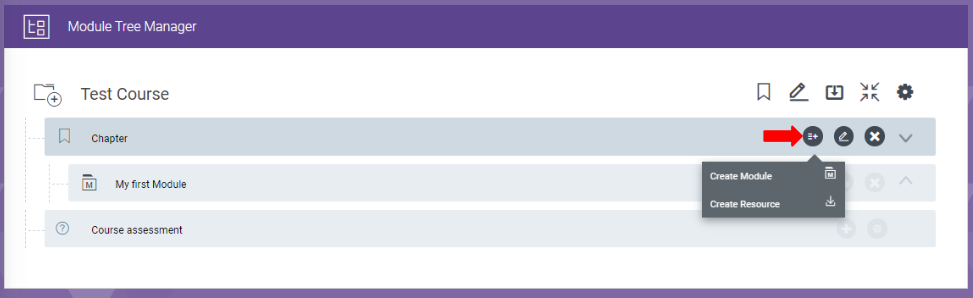
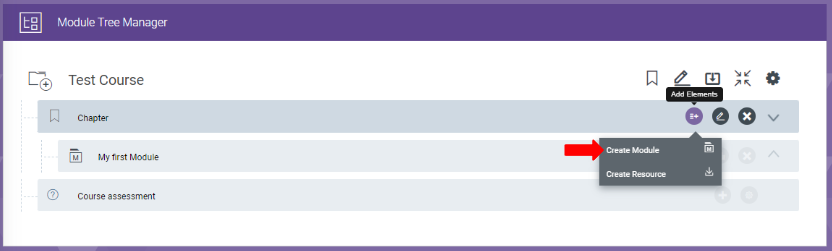
Select the Add Elements option in the Chapter menu to create a new module or course resource:
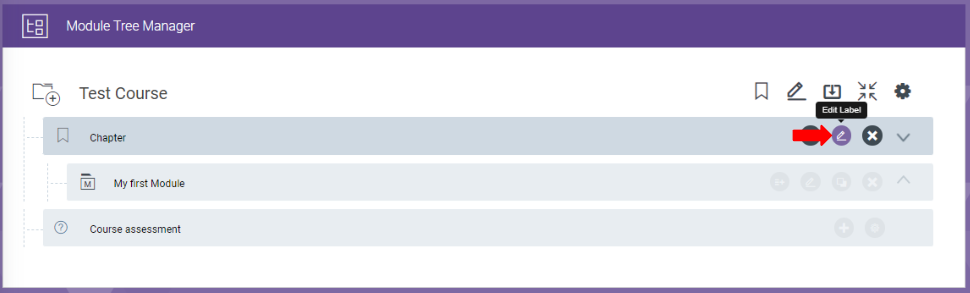
Select the Edit Label option to write a text label for a course or module:
Provide the fundamental details for your label. If you're uncertain about the name you wish to assign to your label, that's okay. You can return and edit it at any time.

Using chapters to divide long courses into different sections is rarely used. Typical Diploma courses contain around 8-10 modules and typical Certificate courses contain 4-5 modules, so most of the time there is no need for multiple chapters. There are some exceptions however:
Alison’s Diploma in Garden Design and Maintenance course contains 32 modules and 269 topics. The course was divided into 5 chapters, dealing with separate areas of the course.
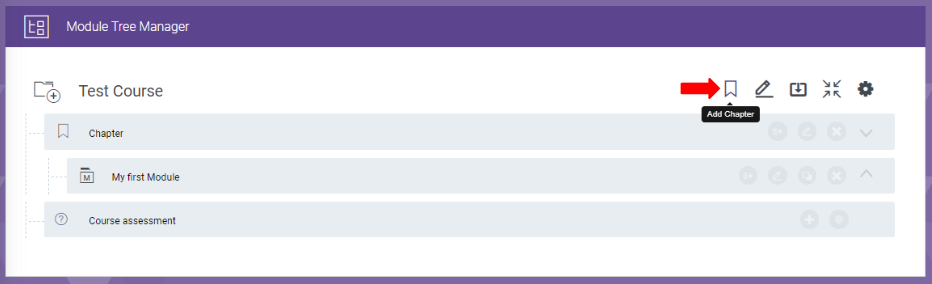
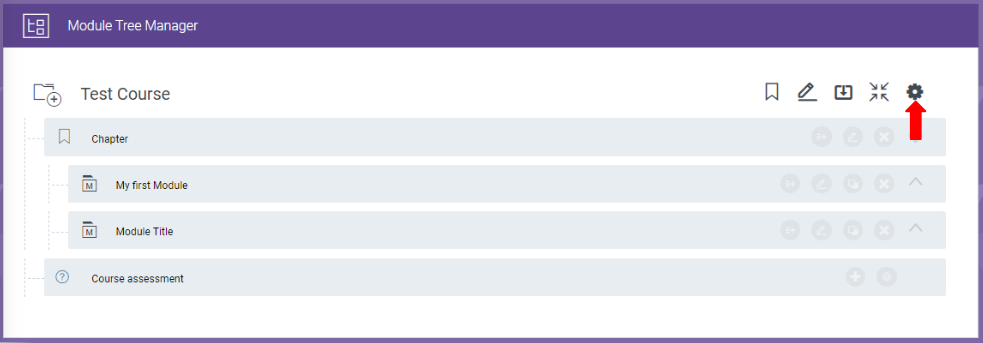
If you need to add an additional chapter or chapters to a course, you can do so by selecting the Add chapter option in the Module Tree Manager:
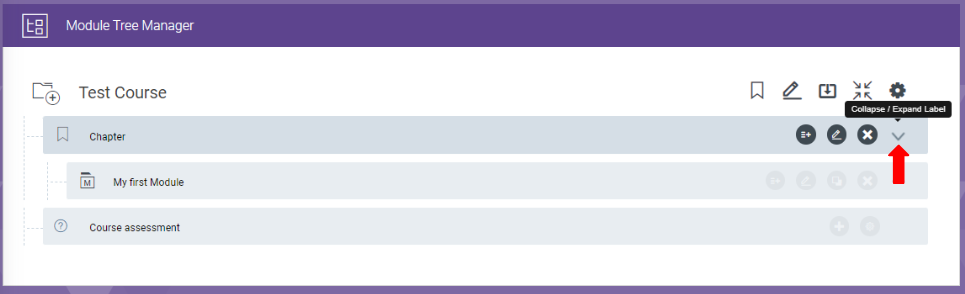
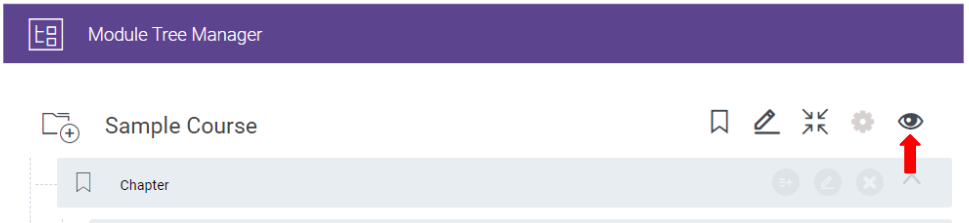
Finally, clicking on the Collapse / Expand Label option in the Module Tree Manager, allows you to view and hide modules in each chapter:
Step 2 - Module
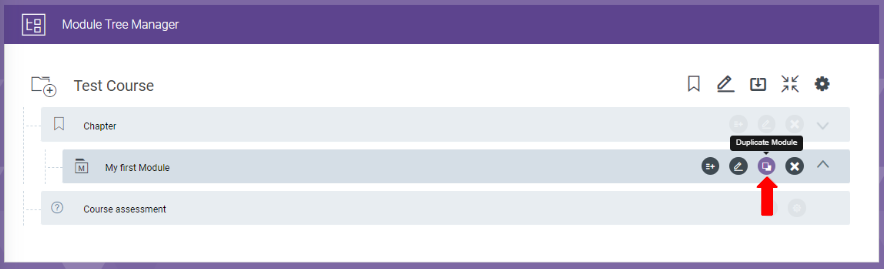
When you create a new course in the Publishing Tool, it comes with a default module and topic. You can create a new module by duplicating it:or by selecting the Create Module option in the Chapter section:
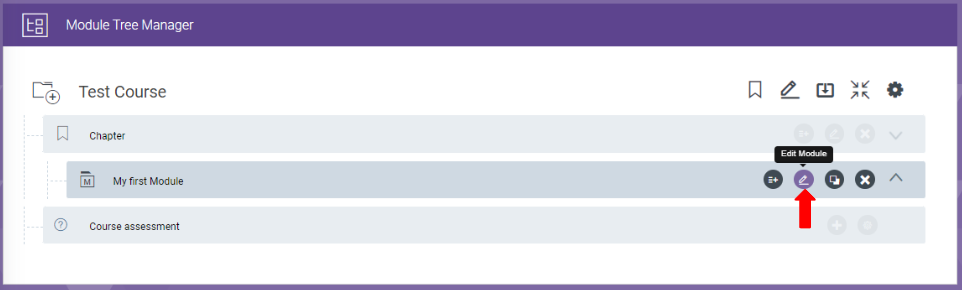
To add your own title and description to a module, select the Edit Module option:
The module title and description should provide a clear depiction of the module's content, offering a summary of the included topics. The module title text field allows up to 100 characters, including spaces, while the module description field permits 350 characters. An effective approach for crafting the module description is to succinctly summarise three topics derived from the learning outcomes.
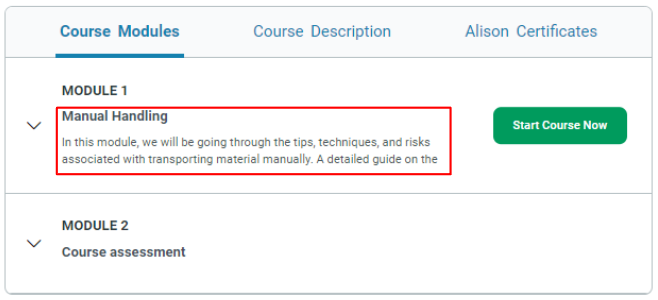
Module titles and descriptions are prominently featured in the modules section of the main course page.
An Alison certificate course typically comprises an average of 5 modules, while a diploma course typically consists of around 10 modules. Each module should encompass approximately 5 topics, which includes 3 lesson topics in addition to the learning outcomes and lesson summary topics.
Step 3 - Topic
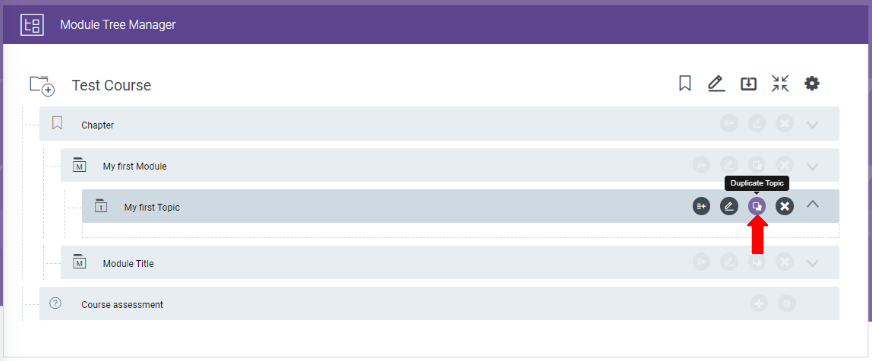
When you create a new course in the Publishing Tool, it comes with a default module and topic. You can create a new topic by duplicating it:
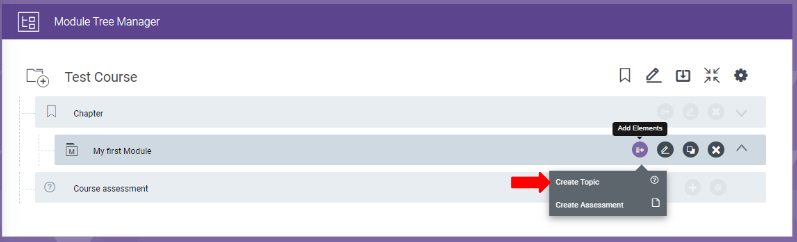
or by selecting the Create Topic option in the Module section:
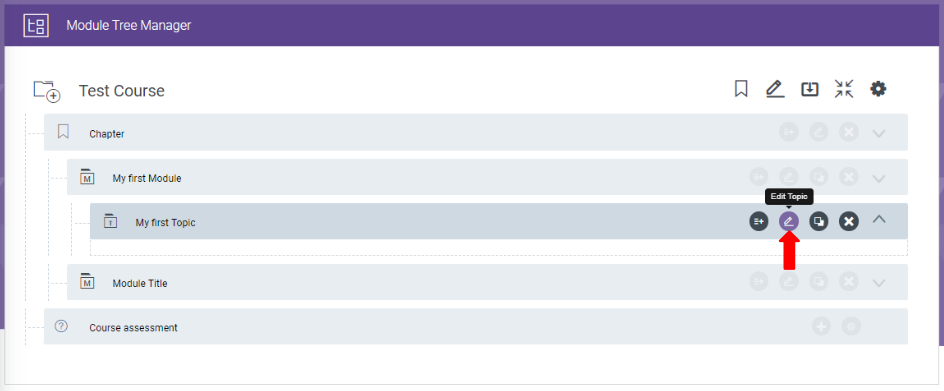
To add your own title and description to a topic, select the Edit Topic option:
Step 4 - Content
The initial page of your course will be the lesson summary. This concise summary provides a quick overview of the course, showcasing its value to the user. It emphasises the course's relevance for personal or professional development and offers a glimpse into the engaging and useful subject matter. The short summary also serves as a sneak peek into specific content, topics, and concepts covered within the course. It is essential to avoid listing topics and instead create descriptive sentences.
The final page is the Bibliography or Reference list, and you can learn how to create this page by visiting: https://player.vimeo.com/video/442636324
Other pages within your course are entirely at your discretion. You have the flexibility to add any course-related information you wish to convey. Refer to the article on assets Assets for guidance on structuring pages effectively.
Don't forget to incorporate course resources, such as training materials and further reading, to enhance the learning experience. https://player.vimeo.com/video/443005480
Step 5 - Assessment
There are 5 fields you need to fill in for this section.
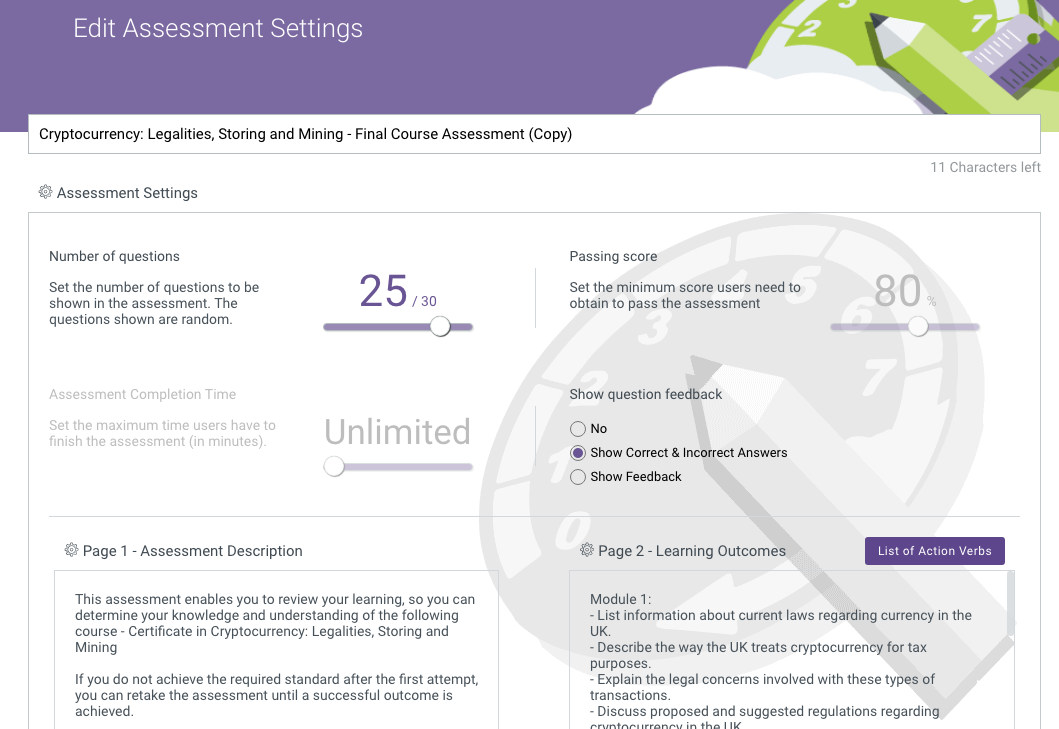
Title
Style as: “<Course Title> - Course Assessment”
Number of Questions
This is the number of formative questions that the student must answer. You must ensure that your bank is greater than this. Refer to Guidelines for Assessments article to read more about questions and questions types.
Show Question Feedback
Select “Show Correct & Incorrect Answers”
Assessment Description
Copy and paste the text below into this section, making sure to insert your course name where indicated.
<This assessment enables you to review your learning, so you can determine your knowledge and understanding of the following course: Insert the Name of Your Course Here
If you do not achieve the required standard after the first attempt, you can retake the assessment until a successful outcome is achieved.>
Learning Outcomes
The learning outcomes for the final assessment should be a combination of course level outcomes, from the ‘Edit Course’ section, and also module level outcomes.
Style as below:
You will be assessed on the following learning outcomes:
- LO1
- LO2
- LO3 etc
Step 6 - Preview your course
To submit your course for review, you will need to first generate a Course Preview by selecting the Course Preview Generator button, as highlighted in the image below:
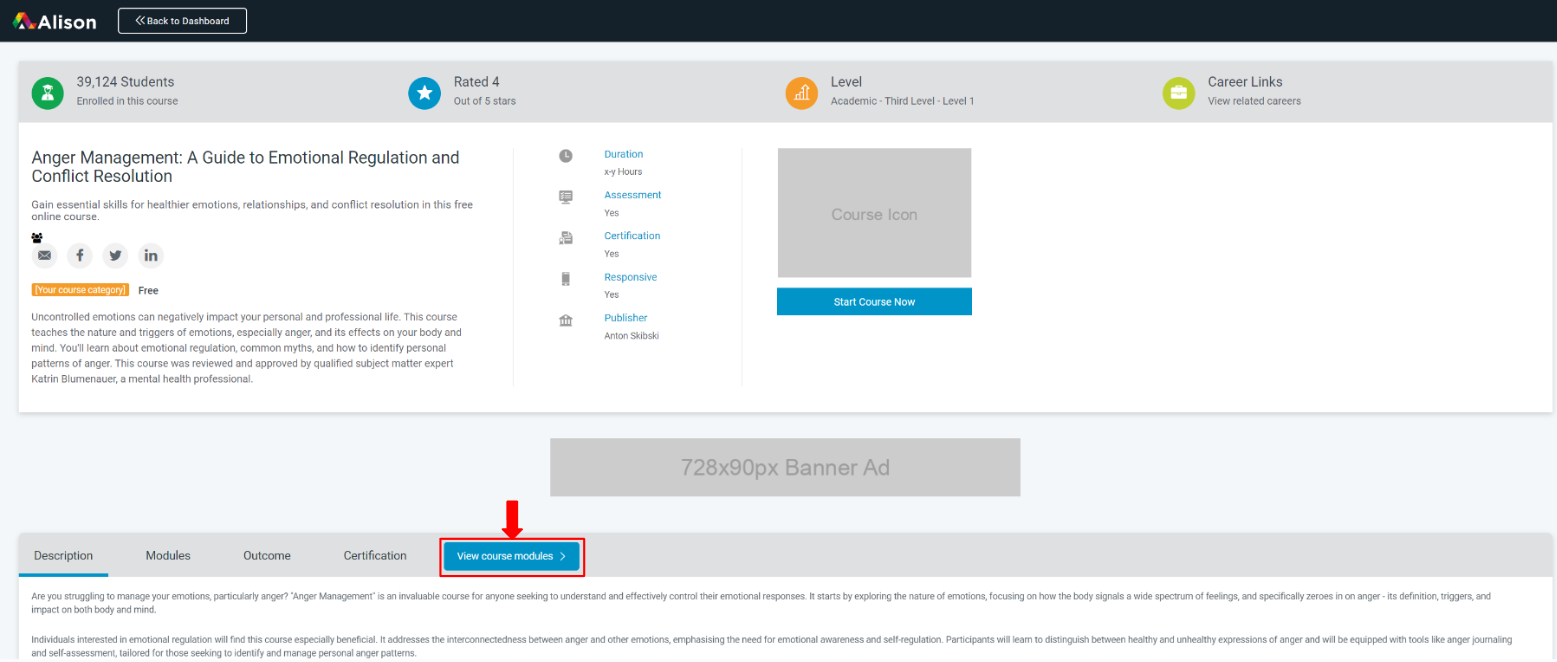
Once the preview has been generated, you can access the preview by selecting the Course Preview button as highlighted in the image below:
After selecting the Course Preview button, you will be presented with a preview of what the course will look like live on the website. You will then need to select the View course modules.
When you have made changes to your course you will need to preview it again to ensure the changes have been made.
Step 7 - Submit Course for Review
Once you select the View course modules button, you will see an option to Submit for Review will appear at the top of the page as highlighted in the image below.

Simply select the Submit for Review button and your course will be now sent to us for review. If you search for the course in the home page of the publishing team you will now see that the status has changed to Sent for review as highlighted in the image below.

Once the course has been accepted by us to review your course status will be updated to In Review as shown in the sample below.

Thank you! We appreciate your feedback.
We're sorry this article was not helpful.
Please leave us a message with your feedback so we can improve this article. If you choose not to provide your email we will not be able to respond to you directly.


Can’t find the answer you’re looking for?
Don’t worry, we’re here to help! Contact our Learner Support Team with your question.
Contact Support


